For an app to succeed, having an idea is not enough on its own; turning that first spark into a durable, releasable product takes a set of considered decisions and orderly processes. That road begins with the first conversations with a potential audience and establishing what they really need, carries on through designing the user experience and the technical architecture, and finally reaches release in the official stores and the monitoring of how the app performs. The purpose of this article is to draw a roadmap that offers practical measures and dependable checklists at every step, so that young teams and experienced organisations alike can manage a project's cost, time and risk properly.
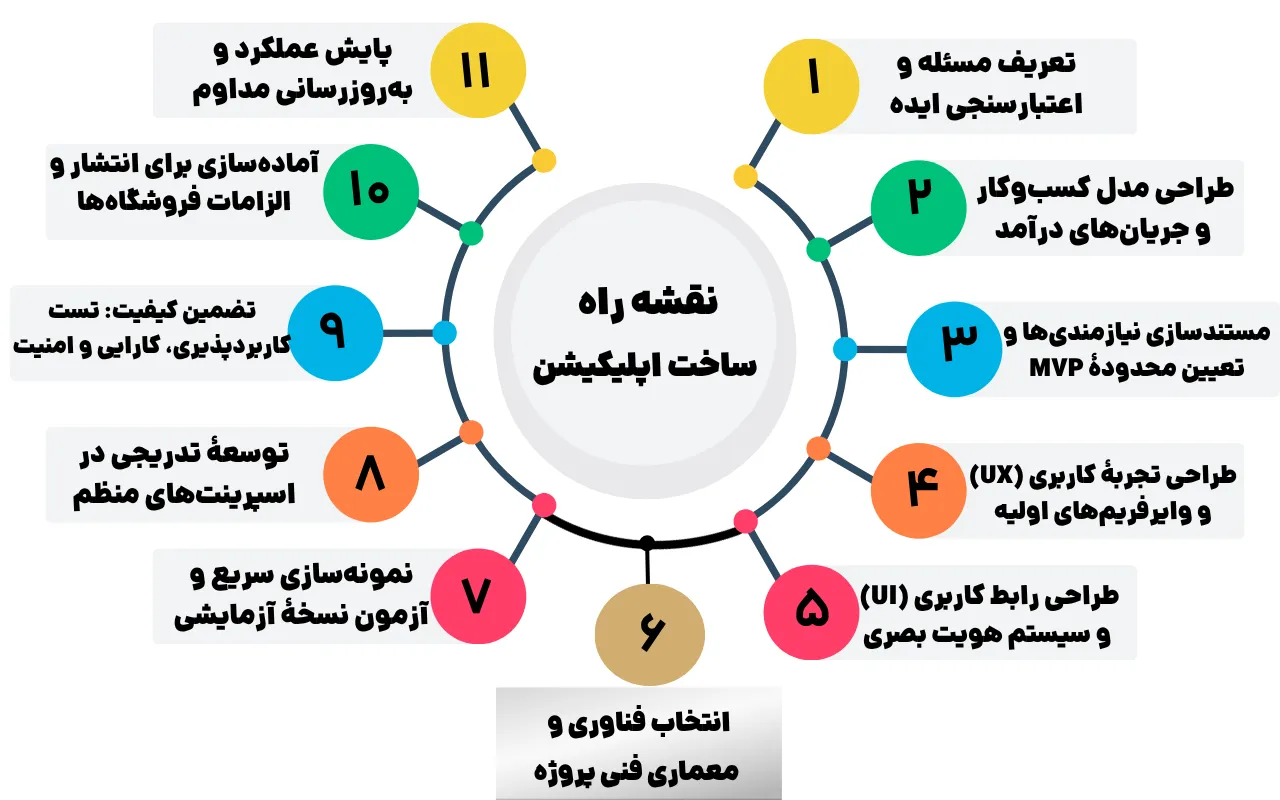
Defining the problem and validating the idea
Every successful project begins with a precise understanding of the problem. Before a line of code is written, it has to be clear which of the user's pains is to be relieved and how serious that pain is. To gauge it, you can use short interviews, an online survey or even a simple landing page — a page that sets out the value proposition and measures a real response from the audience. If users are willing to give their email address or their time for it, that is a sign the idea has some validity in the market; if not, it is better to reconsider the product concept or the target persona.
Designing the business model and the revenue streams
Having established that the problem exists, you have to settle how the costs of development and maintenance will be met and how a profit will be made. First choose the shape of the revenue (advertising, in-app purchase, subscription or a fixed payment), then estimate the costs: initial development, infrastructure, support and marketing. Tools such as the Business Model Canvas help make the value stream, the cost areas and the channels of communication with customers clear, so that the investment takes a sensible form.
Documenting the requirements and setting the scope of the MVP
The idea is clear and the financial model defined; now you have to establish what is "really needed" to bring a first version of the product to market. To do that, write the features in the user's language (as user stories) and prioritise them with the MoSCoW approach — Must, Should, Could, Won't. The result is a list of the MVP's vital capabilities, which keeps development focused. The more precise the documentation — and the more ambiguous terms are avoided — the smaller the chance of misunderstanding among the stakeholders.
Designing the user experience (UX) and the first wireframes
Before going into visual detail, the paths of a user's interaction have to be drawn. A user journey map can include the colour palette, the typefaces, the spacing rules and a set of recurring components (button, card, navigation bar). The next step is to prepare a suitable wireframe: black-and-white sketches showing the arrangement of elements and the flow between screens. This stage keeps the cost of changes at its lowest, because it does not yet depend on graphic design or on implementation.
Designing the interface (UI) and the visual identity system
Once the wireframes are prepared, it is time for graphic design and for setting out the visual system. At this stage, the choice of colour and typography and the design of components such as buttons, forms, cards and navigation bars have to be done carefully. Many teams draw on professional app design to be sure of visual coherence and a unified user experience.
Interface design is not merely a matter of visual beauty; it also has to accord with the principles of accessibility, readability and responsiveness. To that end, setting out a small design system at this early point is recommended — a set of rules and repeatable parts covering the colour palette, the typographic structure, the spacing, the icon style and the base components.
Using a system of this kind not only speeds up front-end development and reduces errors in building screens, it also prevents inconsistency in the final result across a team of several people. Observing accessibility standards (WCAG, for instance) likewise ensures that the app can be used by a wider range of people, including those with particular needs.
Choosing the technology and the project's technical architecture
The choice of platform and architecture sets the general direction of development and bears directly on cost, delivery time and the quality of maintenance. First, examine how well each technology's characteristics fit the product's needs: if speed to market and a unified codebase are the priority, multi-platform frameworks such as Flutter or React Native are good options; where native performance, integration with low-level services or full access to the device's APIs matter more, native development with Kotlin/Swift is preferable. At the level of architecture, patterns such as Clean Architecture or MVVM simplify development and testing by separating the layers (data, domain and presentation). Documenting the technical decisions — the reasons for rejecting or accepting each option — also helps keep the team aligned and matters clear to the stakeholders.
Rapid prototyping and testing a trial version
A prototype is the most efficient way of finding hidden faults before entering full development. Using tools such as Figma (for a clickable prototype) or low-code platforms, a simple working version can be built within a few days. That first version is run on the main devices in the market and tested against real user scenarios so that any uncertainty in the flow of work, in speed or in the user's understanding can be resolved. Feedback at this stage is the cheapest form of correction; every minute spent on revision now saves dozens of hours of later development.
Gradual development in regular sprints
Once the prototype is settled, the project enters short cycles of development. A sprint of two to three weeks lets the team build the prioritised features in small but deliverable packages. On the first day of each sprint, the goals and the definition of done are established; at the end of the sprint, a working version is shown to the stakeholders along with a demonstration. That continuous feedback makes a change of direction simple and transparent and removes the risk of bugs piling up at the end of the project. To support the process, an automated build pipeline (CI/CD) is set up so that every commit runs the tests and produces an installable output.
Assuring quality: usability, performance and security testing
Quality is not assured by unit tests alone. Testing in several layers — unit, integration and interface — alongside performance testing (load and stress) gives a complete picture of a product's health. On security, the OWASP Mobile Top 10 checklist is the basis of the work: controlling permissions, encrypting sensitive data and preventing the injection of malicious code. In usability testing, real user scenarios are run: how many steps it takes to sign up, how the app behaves on a weak internet connection, or how much battery it uses in the background. The output of this stage is a report the development team can act on and a repeatable measure for confirming that faults have been fixed.
Preparing for release and the stores' requirements
Before uploading to the stores, the technical and content requirements have to be complete: the digital signature (keystore / signing certificate), the version configuration (versionCode, versionName) and setting up AAB packaging for Google Play. On the content side, screenshots, a preview video and text optimised for the stores' keywords (ASO) are prepared. Documents covering the privacy policy and the terms of use are also required, as HTTPS links. Domestic stores such as Cafe Bazaar or Myket have their own forms for developer information and for agreeing to their rules; not completing them precisely can lead to a release being rejected or suspended.

Monitoring performance and updating continuously
Do not forget that release is not the end of the work; support and growth really begin from that point on. Key indicators such as crash-free users, seven-day retention, battery use and average revenue per user (ARPU) are monitored through tools such as Firebase Analytics or AppMetrica. Every new version should be released on the basis of real behavioural data; a common crash or a pattern of users leaving early becomes the basis for prioritising the backlog. Operating system updates and changes to store policy (a required target SDK, for instance) also mean that periodic technical migration should be provided for in the development calendar, so that the app is not dropped from the stores' listings or rankings.
In summary
Building a successful app depends less on an innovative idea than on carrying out the development process precisely, step by step. From understanding the problem and gauging real demand in the market to designing the user experience, choosing the right technology and meeting the technical and content requirements for release, every step taken properly and with the business in view reduces the risk of failure considerably. Monitoring the app's performance continuously after release and updating it regularly on the basis of user feedback likewise guarantees its survival in today's competitive market. If you decide to set out on this road, then, regard it not merely as a software development project but as building a living, growing product.